Assemble a hospital bed might seem like a complex task, but with the right steps, it can be straightforward and even satisfying. Whether you’re setting one up for a patient or a healthcare facility, understanding the components and how they fit together is key. So, are you ready to tackle this assembly? Let’s walk through the process step-by-step, and by the end, you’ll have the bed set up in no time!
Overview of Hospital Bed Components
Understanding the components of a hospital bed is important for proper assembly and functionality. Hospital Beds have several key parts that ensure comfort, safety, and ease of use for both patients and healthcare professionals.
Bed Frame
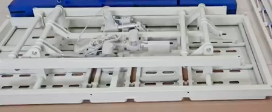
The bed frame provides stability and support. It is typically made from metal or wood that can withstand heavy use. There are two main types of bed frames: – Steel bed frames: Heavier, offering high stability, especially in settings with limited movement. – Aluminum alloy bed frames: Lighter, ideal for beds requiring high mobility.
The frame also includes leg or caster attachments that allow for easy movement or locking mechanisms to keep the bed in place.

Assemble a hospital bed
Mattress Platform
The mattress platform supports the mattress and ensures patient comfort. It is usually made from spring coils or foam, providing necessary support for patients who spend extended periods in bed. Many Hospital beds also feature adjustable platforms, allowing the head or legs to be elevated for better comfort.
Side Rails
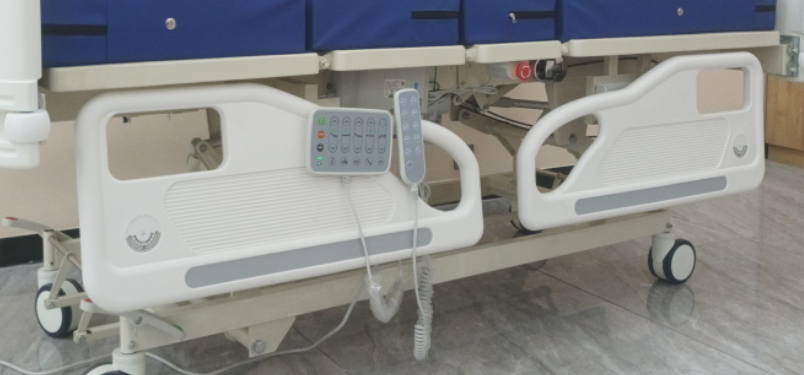
Side rails are important for safety, preventing the patient from falling or rolling off the bed. They attach to the bed frame and provide a protective barrier on one or both sides. Some beds include locking mechanisms or alarm systems for added security.
Electrical Components (if applicable)
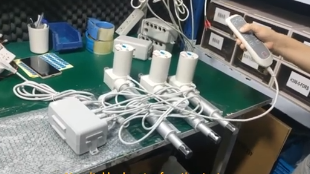
Many modern hospital beds have electrical components that allow easy adjustment of the bed’s height, head, and leg positions. These motorized mechanisms offer convenience and customized comfort. When assembling a bed with electrical features, it’s important to follow the manufacturer’s instructions to avoid electrical hazards. The process includes: – Identifying all electrical connections and cables. – Connecting the components securely to prevent malfunctions.
Preparing the Workspace and Tools
Before assembling the hospital bed, it’s important to prepare the workspace and tools to ensure the process goes smoothly.
Clear the Area
Make sure the assembly area is spacious and free from obstacles like furniture or lamps. A clean area will give you room to move and work comfortably, reducing the risk of mistakes during assembly.
Gather Required Tools
You will need the following tools for the hospital bed assembly:
- Screwdriver: To tighten or loosen screws.
- Adjustable Wrench: To handle bolts and nuts of different sizes.
- Rubber Mallet: To avoid damaging the bed’s components during assembly.
Read Manufacturer’s Instructions
Start by reading the manufacturer’s assembly instructions. Each hospital bed may have different requirements, so following the specific steps will guide you and help you assemble the bed correctly.
Ensure Adequate Space
Ensure the workspace is large enough for all the bed components. Lay out the bed frame parts neatly so they are easy to access and nothing is missing.
Organize Components
After unpacking, organize the components by type and size. This will make it easier to find the right parts as you proceed, helping the assembly go more smoothly without unnecessary delays.
By following these steps, you can create a safe and efficient workspace for assembling your hospital bed.
Step-by-Step Assembly Guide
The video below shows the assembly process of one of Grace Medy‘s hospital beds. Grace Medy is a hospital bed manufacturer. After you purchase a hospital bed, if you need it, contact Grace Medy and they will provide you with an assembly video. They will tell you in detail how to assemble it. They not only produce hospital beds, but also supply supporting hospital furniture such as bedside cabinets and hospital chairs, rehabilitation equipment such as Wheelchairs and walkers, and operating room equipment such as Operating tables, operating lights and emergency carts.
Follow these instructions to assemble a hospital bed:
- Unpack and Organize Components
Unpack all bed frame components and organize them neatly. Ensure all parts are present before starting the assembly. - Read the Assembly Instructions
Take a moment to read through the assembly instructions to understand the process. This will save time later. - Attach the Head Spring
- Lay the head spring on its side so the center mounting latches are visible.
- Open the section at a 45-degree angle if needed.
- Extend the pull tube on the foot spring until the spring button clicks into the adjustment hole on the outer pull tube.
- Remove the hitch pin and grommet from the clevis pin. Insert the clevis pin into the lift arm slot of the head spring, then replace the grommet and secure it with the hitch pin.
- Stand the Head End
Place the head end near the head spring. Grasp the head spring from underneath and raise it, aligning the fasteners on the head spring with the latches on the head end. Repeat the process for the foot end.
Additional Assembly Details
- Attach the Bed Legs or Casters
Install the bed legs or casters as instructed. Tighten the connections with a screwdriver or wrench.
Make sure the casters are locked in place to prevent any accidental movement. - Assemble the Head and Foot Boards
- Align the head and foot boards with the frame mounting hooks.
- Press the frame down securely to lock the boards into place.
- Lock the side locks over the frame hooks on both ends of the bed to prevent the boards from detaching.
- Install the Drive Shaft
Install the spring-loaded drive shaft. This part allows the bed to be raised vertically. Ensure the drive shaft is oriented correctly, with the spring-loaded section at one end and notched ends on both sides. - Check All Connections
After assembly, double-check that all bolts, locknuts, and screws are tight. Make sure the siderails move and latch properly, and confirm that the head and foot boards, along with the foot support arm, are undamaged.
Safety and Electrical Cautions
When assembling and using a hospital bed, follow these safety precautions to prevent electrical hazards and protect both patients and operators.
Power Source and Electrical Components
- Connect the hospital bed to an appropriate power source. Regularly check the power cord and electrical components to ensure they are functioning properly and avoid hazards.
- Keep power supply cords away from being pinched or squeezed between bed parts. Damaged cords or improper handling can lead to shock hazards.
Avoid Electrical Hazards
- Keep electrical components such as the power cord, outlets, control box, and hand pendant away from water. Wet components can cause electric shock or other safety issues.
- Never operate the bed if any electrical parts like the power cord, outlet, motor/actuator, or mechanical components are damaged or malfunctioning. Replace or repair faulty parts before use.
Proper Use of Extension Cords
- If using an extension cord, ensure it is at least 16 AWG (American Wire Gauge) and matches or exceeds the bed’s power requirements. Using the wrong extension cord can cause fire or electric shock risks.
Oxygen Administering Equipment
- When using oxygen equipment (nasal or mask type), ensure the tubing is securely routed to prevent tangling or damage during bed operation.
- Never use the bed near explosive gases, and avoid using non-nasal or non-mask oxygen equipment, as this could increase fire risks.
Assembly Precautions
- Do not rotate the pull tube or motor shaft during assembly, as this can cause misalignment and damage the bed frame.
- Complete the entire bed assembly before using any controls to prevent damage or injury.
Proper Electrical Connections
- Make electrical connections according to the manufacturer’s instructions. Check that cables and plugs are properly installed, especially near the control panel or foot of the bed. Secure all plugs for stable electrical connections.
Battery and Power Backup
- Ensure the bed has a proper power backup, such as a 9V battery, so the bed can move to the lowest position during power outages.
Fire Hazard Prevention
- If the bed will not be used for an extended period, unplug it from the outlet to prevent fire hazards.
Patient Safety
- To avoid entanglement risks, patients with reduced mental clarity should not have access to the pendant. Check safety features like bed exit alarms and side rail locks to ensure they are functioning properly for patient safety.


